Attaching the balloon inflator
Helium tank safety is important. Helium Set Up, cylinder safety and Balloon Inflation Instructions to help you make your decorating easy and safe.


Helium tank safety. Helium Set Up, cylinder safety and Balloon Inflation Instructions to help you use helium to fill your balloons safely and easily.
CAP
If you have the big tank, you must remove the safety cap first. Rotate the cap counterclockwise to remove the cap.
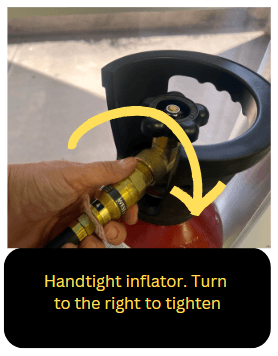
INFLATOR
Now is the time to put the balloon inflator on the tank. To tighten the valve, use to turn it clockwise until it stops.
OPEN THE TANK
Now, turn on the tank. There is a valve on the very top of the tank. You will see open and close markings with arrows.
Turn the handwheel counterclockwise to open the valve.
INFLATE BALLOONS
To inflate balloons, you put your balloon on the black rubber tip and gently bend it slightly in any direction. Be careful not to bend it too far forcefully, or you will break the tip.
TURN TANK OFF
When you are done inflating balloons, turn the tank off. You will turn the handwheel at the top of the tank clockwise to turn the valve to the closed position.
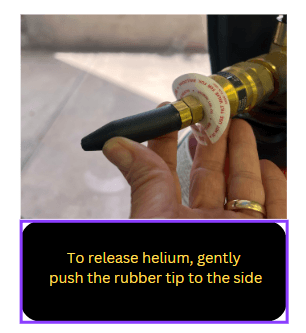
RELEASE TANK PRESSURE
After your close the valve, a small amount of helium still remains in the inflator that must be released. Gently tilt the rubber tip to the side and the pressure will release very quickly.
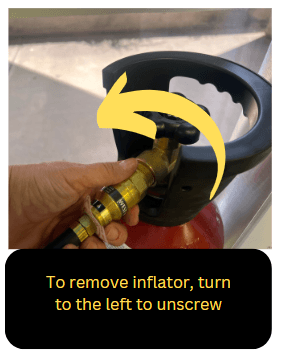
TAKE OFF INFLATOR
When you are done with the tank or relocating the equipment, you will need to remove the inflator. Once the pressure is released, you will be able to remove the inflator by hand. Grip the inflator and turn counterclockwise.
CAP
If you have the big tank, you will now need to screw the safety cap back on. The smaller tanks have the black handle that protect the valve and do not need a safety cap.
HELIUM DO’s AND DON’Ts
Helium is an inert, non-toxic, non-flammable gas. However, it is pressurized and can be dangerous if misused or if proper safety practices are ignored. Please review the safety measures to ensure a safe and successful event.
DO NOT:
Do not inhale helium.
Helium displaces oxygen in the lungs, which causes oxygen to not reach your brain.
Do not release gas into the mouth or any other bodily orifices
Helium tanks are highly pressurized. Misuse can damage tissue or cause death.
Do not move with the inflator on
Do not move the tank with the balloon inflator attached. Always remove the inflator before moving or transporting the helium tank. The valve becomes susceptible to damage if the tank falls over or is hit while the inflator is attached, causing a dangerous hazard.
Do not let children operate equipment
Never let children operate a high-pressure gas cylinder. The tank can be dangerous if improperly or carelessly used.
Do not use or store in a closed-in area
Helium tanks need to be used and stored in an area with good ventilation and airflow in case of a helium leak.
Do not release balloons into the sky
Please remember to dispose of balloons properly. When balloons pop high in the atmosphere, their pieces and ribbons fall back to earth and can be harmful to animals and marine life. Released balloons can also become tangled in power lines, which may cause power outages or even explosions.